CASH and FINANCIALS loading screen
This screen opens when you add a PalantirCASH data source; the loading screen for PalantirFINANCIALS is functionally the same with a different product name and logo. For instructions on how to load data, see Load data from PalantirCASH (both applications use the same data loading procedures).
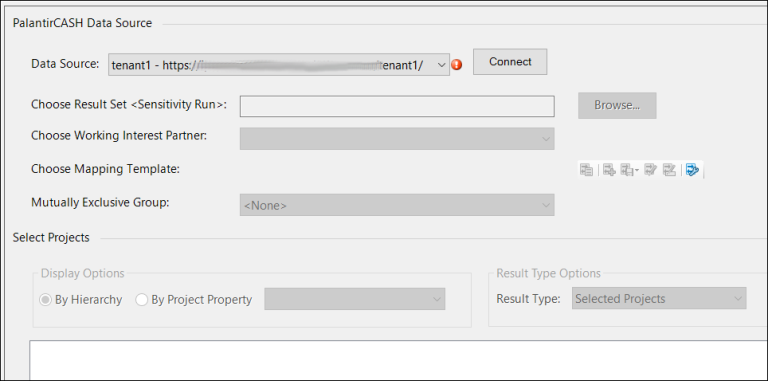
When there is no Data Source connection, most of the screen will be inactive and you will see something like:

Select the tenant for connection and click the Connect button (if the required server and tenant is not listed, you can add it manually using the Manage Connections option).
You will now see a login dialog Sign in to your account. If your PlanningSpace account has a Username and Password that are specific to PlanningSpace, type these into the dialog and click Sign in. If your account has a Windows UPN identifier (something like 'first.lastname@domain.mycompany.com') as the Username, type this in but leave the Password blank; you will see a second dialog generated by an Identity Provider server, in which you may be required to select one of several federated accounts, and you may be requested to enter your federated password (the details depend on how the PlanningSpace user authentication is configured). Note: if you check the Remember me box then your Username will be remembered for the next connection at the same PlanningSpace tenant.
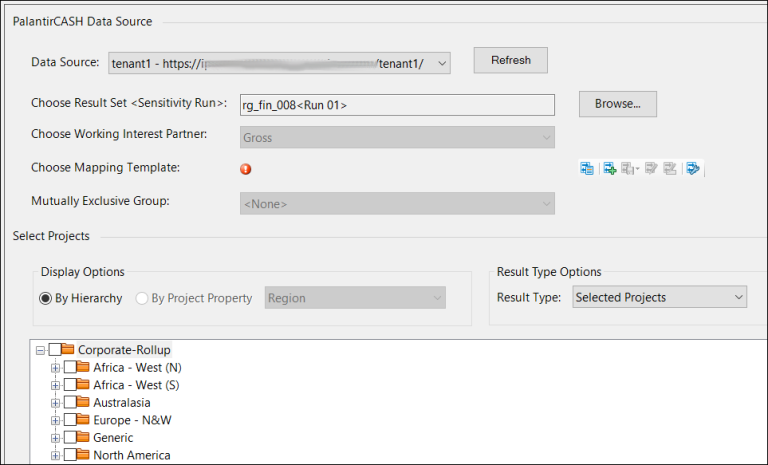
If the connection is successful, you will see something like:

The following table describes the different input fields.
| Field | Description |
|---|---|
| Data Source | Click the down arrow to select the PlanningSpace server and tenant where your CASH or FINANCIALS data are stored. The list will be automatically filled with available tenants based on the server used by your CX Suite applications. To specify a connection manually, select the Manage Connections option on the list. |
| Connect | Click this button to connect to the selected Data Source. |
| Refresh | Click to refresh the list of Result Sets if the Data Source has changed since the |
| Choose Result Set | Select a CASH or FINANCIALS Result Set to load data from. Note that you can also select archived Results Sets. |
| Choose Working Interest Partner | Select a partner whose share will be loaded. Note that the partner's share must have been calculated in the selected Result Set prior to loading into |
| Choose Mapping Template | Select a mapping template. Templates are stored in the CASH or FINANCIALS database associated with the selected CASH or FINANCIALS data source. For more information, see CASH and FINANCIALS mapping template. |
| Manage Template | For information about template management options, see CASH and FINANCIALS mapping template. |
| Mutually Exclusive Group |
Determines the field by which projects will be grouped when data is loaded and optimization takes place. All projects in a Mutually Exclusive group (MEG) must have the same project type; Note: If projects of a different type are detected in the data load, they will be removed from the MEG, and a warning message will be displayed when navigating to the |
| Display Options | Choose how the displayed CASH or FINANCIALS hierarchy will be sorted. By Hierarchy will show consolidations and projects as they are shown in CASH or FINANCIALS. By Project Property will open a list of project properties from CASH or FINANCIALS; note that for this function to work, project properties must be specified in CASH or FINANCIALS. |
| Result Type Options | Choose how data will be loaded. Selected Projects loads just projects even if you select consolidation nodes in the tree view. Selected Consolidations loads consolidated data from projects under selected consolidation nodes. Selected Consolidations and Projects loads both individual projects and consolidated results. |